
What Are Revit Parameters?
Revit parameters are the DNA of elements in Revit. Each element in Revit occupies a location, has a name, is a type of a family, and may have a physical shape, color, weight, cost, and many other attributes associated with it. Revit’s purpose is to communicate a building project design to its owners and constructors. Element parameters are the words, numbers, and other descriptors that make up this communication.
Let’s explore parameters.
Table of Contents:
Types of Revit Parameters
Revit offers five main types of parameters:
System Parameters
System parameters are built into Revit’s API (Application Programming Interface) and cannot be removed, renamed, or modified. Some you may recognize as “Mark”, “Model”, “Manufacturer”, etc. These are displayed in the “Properties” window of each element.
Others, such as “Lighting azimuth” are used by Revit’s analytical functions and may or may not appear in the “Properties” window.
There are over 3500 system parameters. They can be used in both schedules and tags. A list of system parameters for Revit 2024 can be found at this link.
Project Parameters
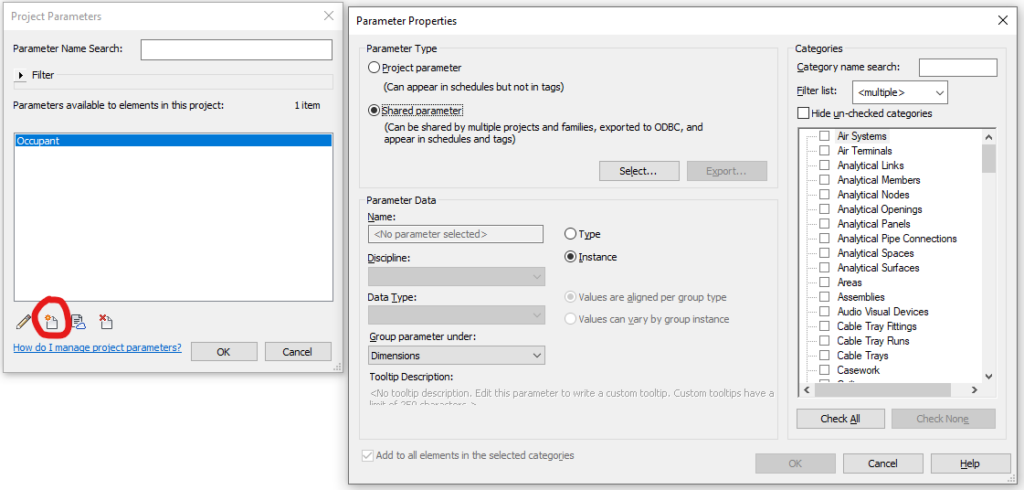
These are handy parameters that can be created on the fly and added to a category or multiple categories. From the “Manage” tab select “Project Parameters” and a pop-up window displays the current project parameters and allows you to create new ones.
Project parameters are project specific, but can be transferred to other Revit projects through the “Transfer Project Standards” tool under the “Manage” tab.
Project parameters can be used in a schedule but cannot be used in tags. For example, if you assign a project parameter of “Fixture Units” to plumbing fixtures, you can list a value for that parameter in your plumbing fixture schedule, but you cannot include that value in a fixture tag in a plan or elevation view. The exception to this occurs when you use a Shared Parameter to create your Project Parameter. Shared Parameters can be used in both schedules and tags.
Family Parameters
Family parameters are created within the family when the family is created. Depending on the category of the family, several system parameters are included by default (those associated with Identity Data). Typical family parameters include dimensions, colors, clearance zones, materials, etc.
When you create different types of families under the same family name, each type may have different values for each parameter. A single flush door, for example, will have different widths and heights in the same family. This allows the Revit user the option of changing door types without having to replace one family with another.
While you can change the values of parameters in a family without editing the family, you must open and edit the family to add new parameters or edit the existing ones.
Family parameters cannot be tagged or scheduled unless the parameter is a Shared Parameter.
Shared Parameters
Shared parameters are the key to maintaining a consistent look and feel across your organization, even if you are an organization of one. These parameters are kept in a separate file, presumably on the company server, and accessed through the “Shared Parameters” tool under the “Manage” tab. The company shared parameters file should be loaded to and saved with your company project template.
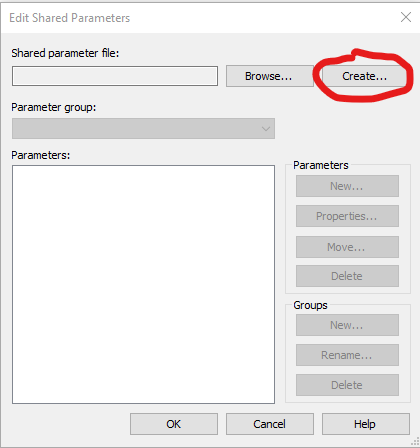
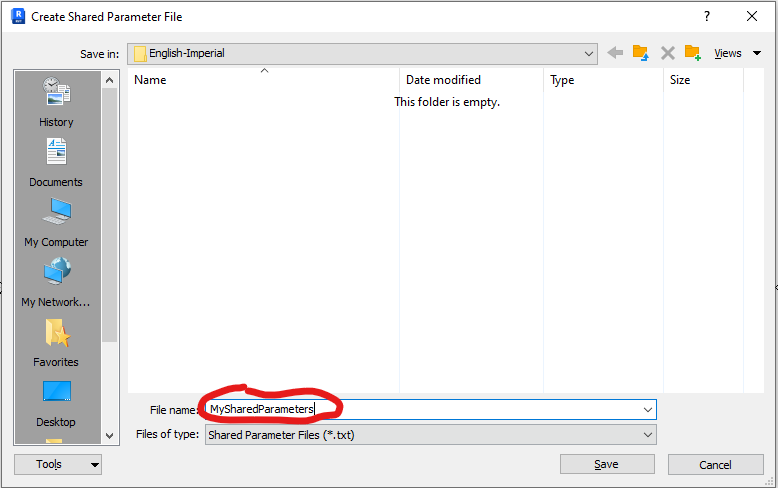
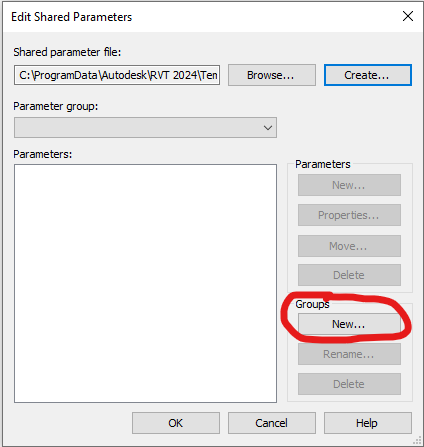
To create from scratch, from the “Manage” tab select “Shared Parameters”. The pop-up window asks you to either Browse for or Create a new file. Select “Create” and give it a name. Make sure you select the correct folder to save the file. You can move it later, but it helps if you chose it now.
The next step is to create a group, or several of them. Consider carefully how you group your shared parameters. How do you intend to use them? I primarily use them in schedules and tags. Schedules and tags are typically grouped by element category, such as walls, doors, pipes, mechanical equipment, etc., so I group my shared parameters similarly.
If I had a group for fans and another for pumps, I would need a “Volts” parameter in each. Or I could have a group named “Electrical” which contains all my electrical parameters. This can get pretty complicated, as a parameter like “flow” will have different units depending on whether it’s associated with a fan (air flow) or pump (water flow).
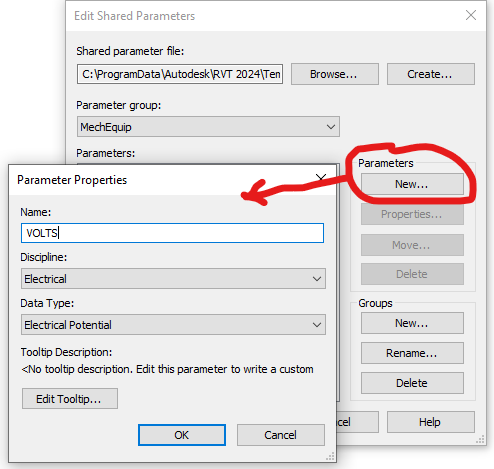
In this case, I chose “MechEquip” as my group name and “Volts” as my first parameter. Don’t get too hung up on this. You can create new groups, delete groups, and move parameters among the groups to suit your needs.
Use a single shared parameter across multiple families to standardize your projects. Each of your shared parameters has a unique GUID (Globally Unique Identifier). Two different shared parameters may share the same name, but they are not the same parameter.
When creating a schedule, you will be faced with a choice of two or three “Volts” parameters. Two may be from different families, and another may be a Project Parameter. I should note here that it’s important that your shared parameters have unique names. You’ll see in the image that my “VOLTS” is all caps. Another method of uniqueness is to use your company’s initials in front of the parameter name. This has the added benefit of keeping your parameters grouped together in lists.
Global Parameters
Global parameters are like family parameters, only in the project environment. Revit introduced them in v2016.2
Use global parameters for repetitive editing. Think materials. If you want all your cabinets to look the same, you can use global parameters to drive the materials by setting the family material equal to the global parameter.
They can be used to set a standard column bay spacing. Set your main column bay spacing at 25 feet. If the building size changes, you can adjust your columns just by changing this parameter.
Reporting parameters can only be used on an instance property, not a type property. These parameters cannot be used to “drive” a value, only report it. The value of reporting parameters is they can be used in formulas.
Global parameters cannot be tagged, scheduled, or used as a shared parameter.
How Parameters Are Used in Revit
Parameters serve several crucial functions in Revit as listed below. Anywhere a parameter value is changed in a project, it is changed in every instance that parameter is shown or used in the project.
Store and display element information
The basic function of any parameter is to store information. Using the “Revit is a database” analogy, each element’s parameter is a “field”, and its content is a “record”.
Type parameters of an element share the same content for all elements of that “type”. Instance parameters’ content may vary for each instance of an element.
Create comprehensive schedules and quantity takeoffs
You can create a schedule that lists the parameter values for any element in your project. Think spreadsheet with the parameter names at the top and the elements with their values as the rows of information. Schedules can be grouped and sorted to present information exactly the way you prefer.
System Parameters, Project Parameters, and Shared Parameters may be used in project schedules.
Populate tags and labels in drawings
Parameters can be used in annotation tags to display information in views. Pipe tags can indicate system, size, slope, elevation, and many other parameters that are associated with pipes.
System Parameters and Shared Parameters may be used in tags and labels.
Allow dynamic adjustments to element properties
Let’s say you want to build a sink family, and one of the parameters you want to control is the height of the sink from the floor. Revit has a built in family parameter “Offset from Level” that determines the insertion point of the family from the Level of insertion.
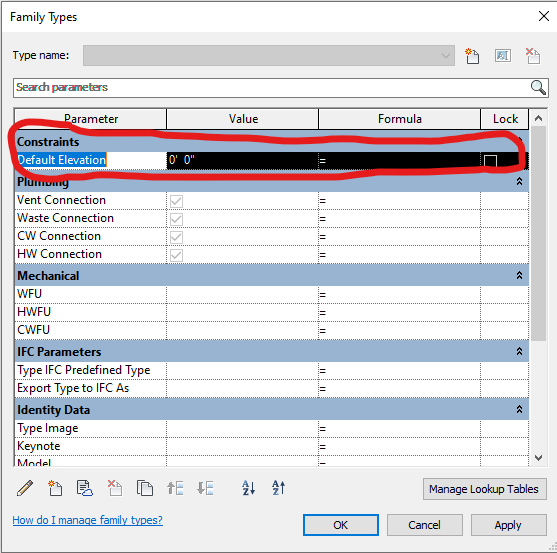
Note that this is a Type Parameter (instance parameters have “(default)” after their name. It will apply to all of the sinks in this family type. This family only has one type. In the “Formula” column, enter the height for your sink next to the “=” sign. When you insert this family into a project, it will be placed at the elevation you entered.
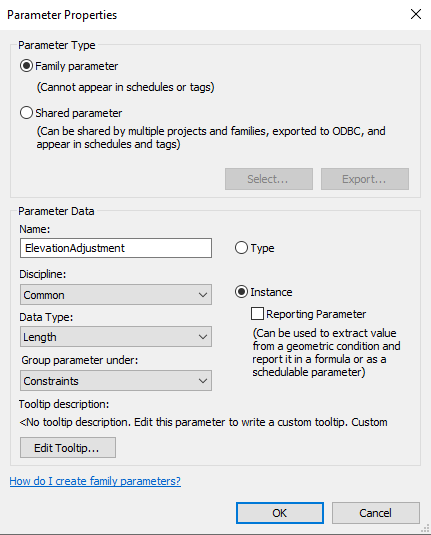
If you want to adjust an individual sink elevation, you can add a parameter to the sink family. Select the “Create New” in the Family Types window and name your family. Here we used “ElevationAdjustment”. Since you want to be able to change one sink without changing all of the sink families in the project, select “Instance”.
When you select “Instance”, the option of making this a “Reporting Parameter” appears. Reporting parameters can be used in formulas and schedules, but you cannot force a change through them. Leave it unchecked for this purpose.
Organize and extract meaningful project information
Enable various analyses, such as cost estimation and energy analysis
Identifying Parameter Types
To determine the type of a given parameter:
- System Parameters: Built-in and cannot be modified
- Project Parameters: Found in the “Project Parameters” dialog under the “Manage” tab
- Family Parameters: Created within family editor and visible in the Family Types dialog
- Shared Parameters: Identified in the “Shared Parameters” dialog under the “Manage” tab
- Global Parameters: Located in the “Global Parameters” dialog under the “Manage” tab
Parameters can also be classified as Type or Instance parameters, determining whether they apply to all instances of an element type or to individual instances.
By mastering the use of parameters, Revit users can create more efficient, accurate, and data-rich models, streamlining the design and construction process.