
Construction project managers tend to want to keep all of the project data in a single cloud based construction management system. Procore is one that is often used.
Procore has created an add-in for Autodesk to help integrate the workflow for building Navisworks nwf files and exporting models from Revit and AutoCAD into nwc files directly into the Procore ‘Documents’ folder location. This post will walk you through the process.
Installing the Procore Plugin
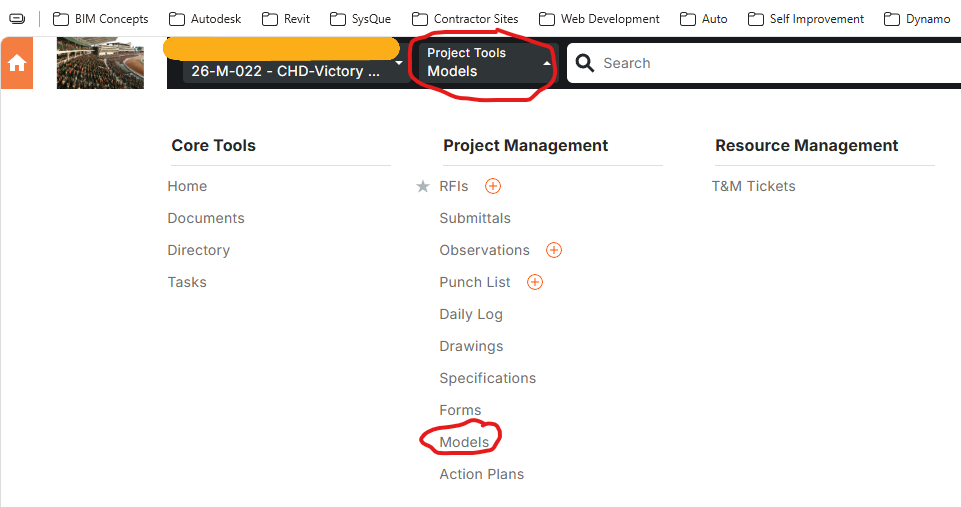
The Procore plugin download can be found in any Procore project that you are a member. Navigate to the ‘Project Tools/Models’ tab and select ‘Models’.
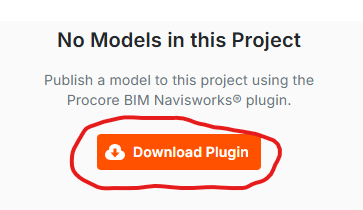
There may or may not be any models in the project, but the link button to ‘Download Plugin’ will be on the page near the bottom. Simply click on it and download it. To my knowledge, once downloaded, it applies across both Navisworks and Revit platforms (not sure about AutoCAD).
Creating a Procore Navisworks Model
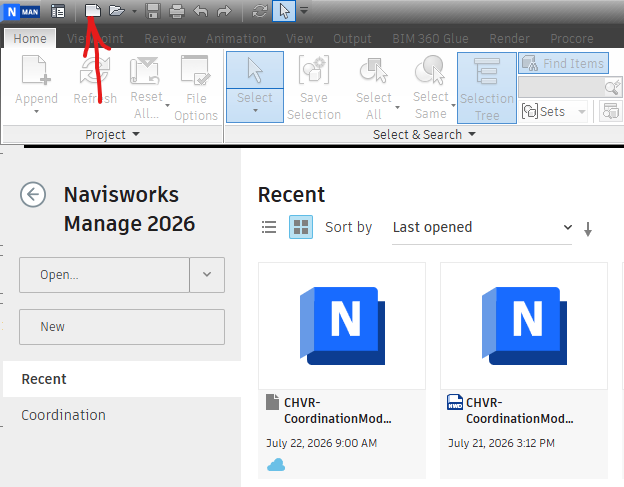
When you first open Navisworks, the menu bar is ghosted, and you either have to load a file or create a new file. Select ‘New File’ to open a blank nwf and access the menu bar.
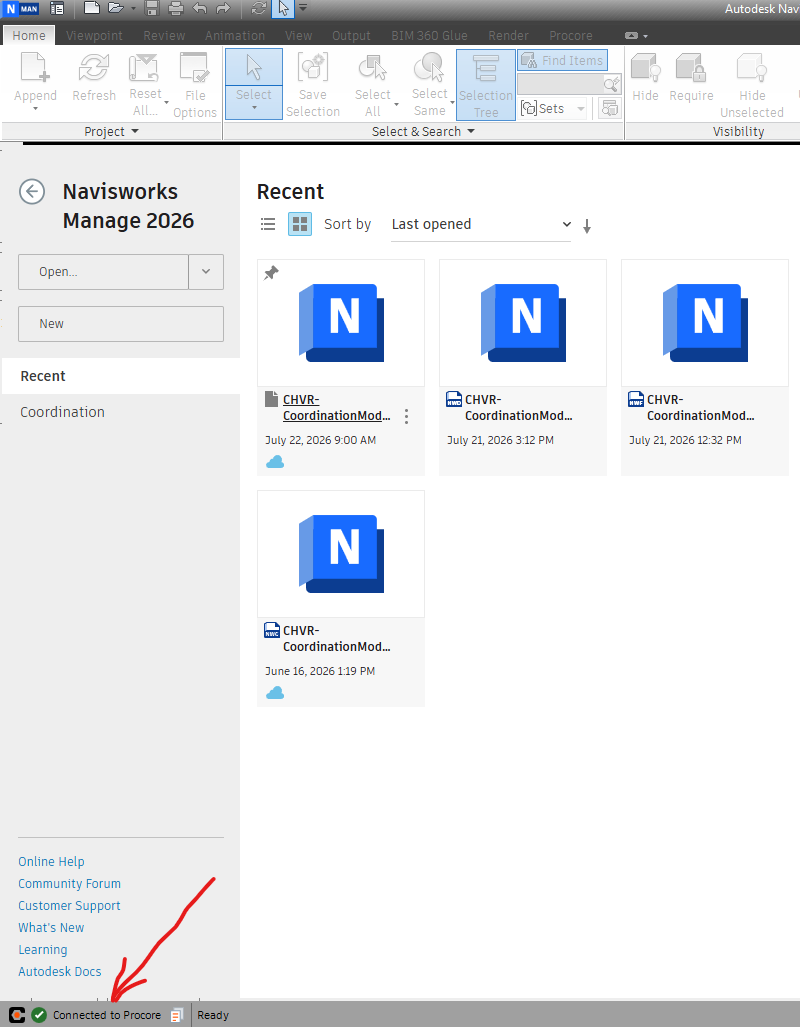
If you’ve properly installed the plugin, ‘Connected to Procore’ will display in the bottom left on the task bar.
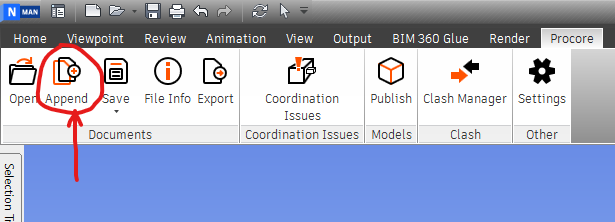
Build your nwf by using the ‘Append’ button on the ‘Procore’ ribbon.
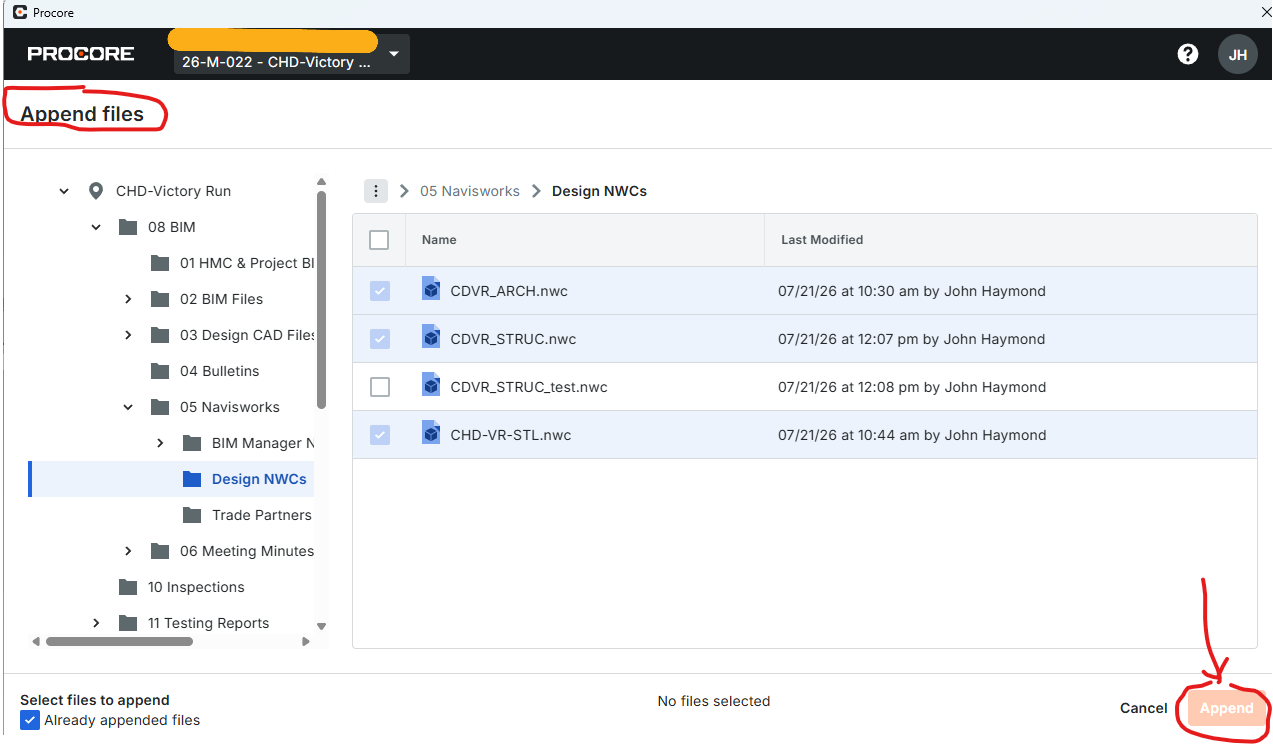
Depending on how your project is set up, navigate to the location of the files you want to add to your Navisworks model. Check the boxes of the files and click on the append button.
Saving Your Navisworks Model
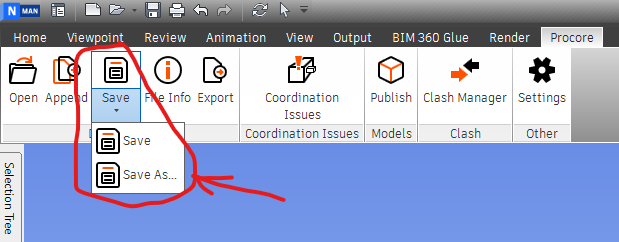
The first time you save the model, navigate to the ‘Procore’ ribbon and select ‘Save’. You will be prompted to select a location for the file. It will save as an nwf. Whenever you select ‘Save’ after this, it will update the nwf.
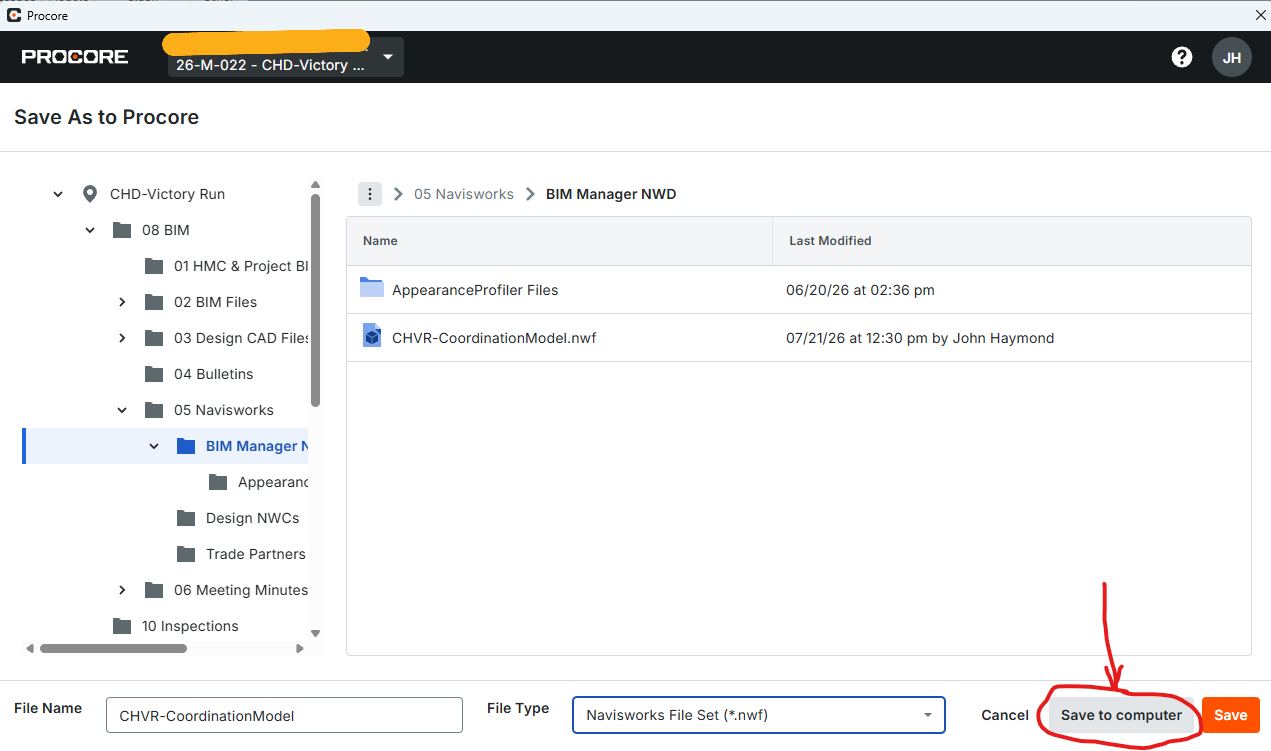
If you select ‘Save As’ you will be directed to the screen shown below. You can enter a new file name if you want to create a new nwf, or you can ‘Save to computer’ if you want to save a local copy or create an nwd. You cannot ‘Save As’ an nwd directly into Procore. You have to save it to your computer first and then upload it to Procore.
Opening a Procore File in Navisworks
When you first open Navisworks, if you are not logged into Procore, you may see the screen below when you open the ‘Procore’ ribbon. Simply select your project to continue.
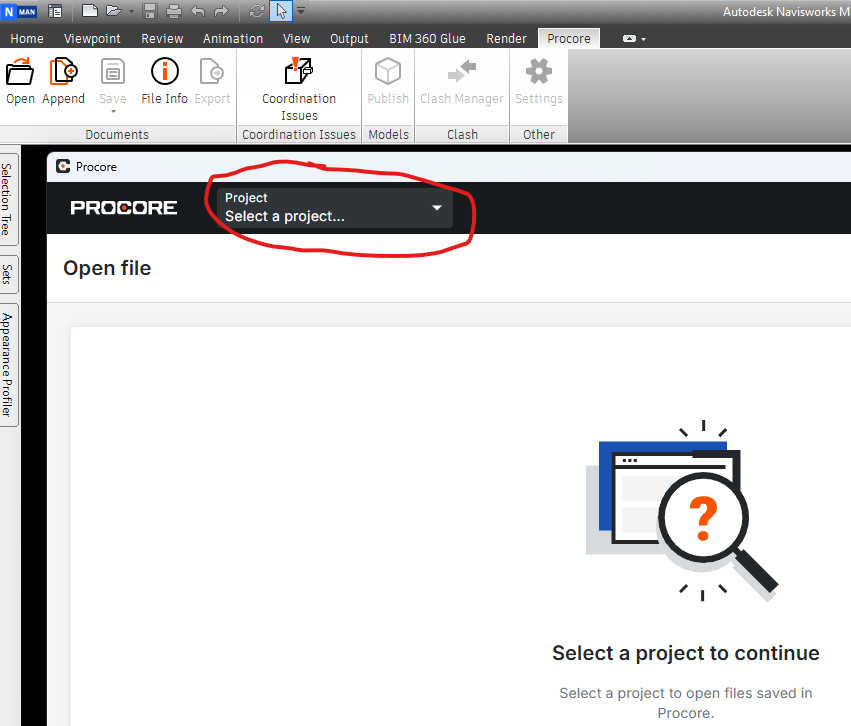
Once you select your project, you will see the navigation screen. Navigate to your file and click on ‘Open’.
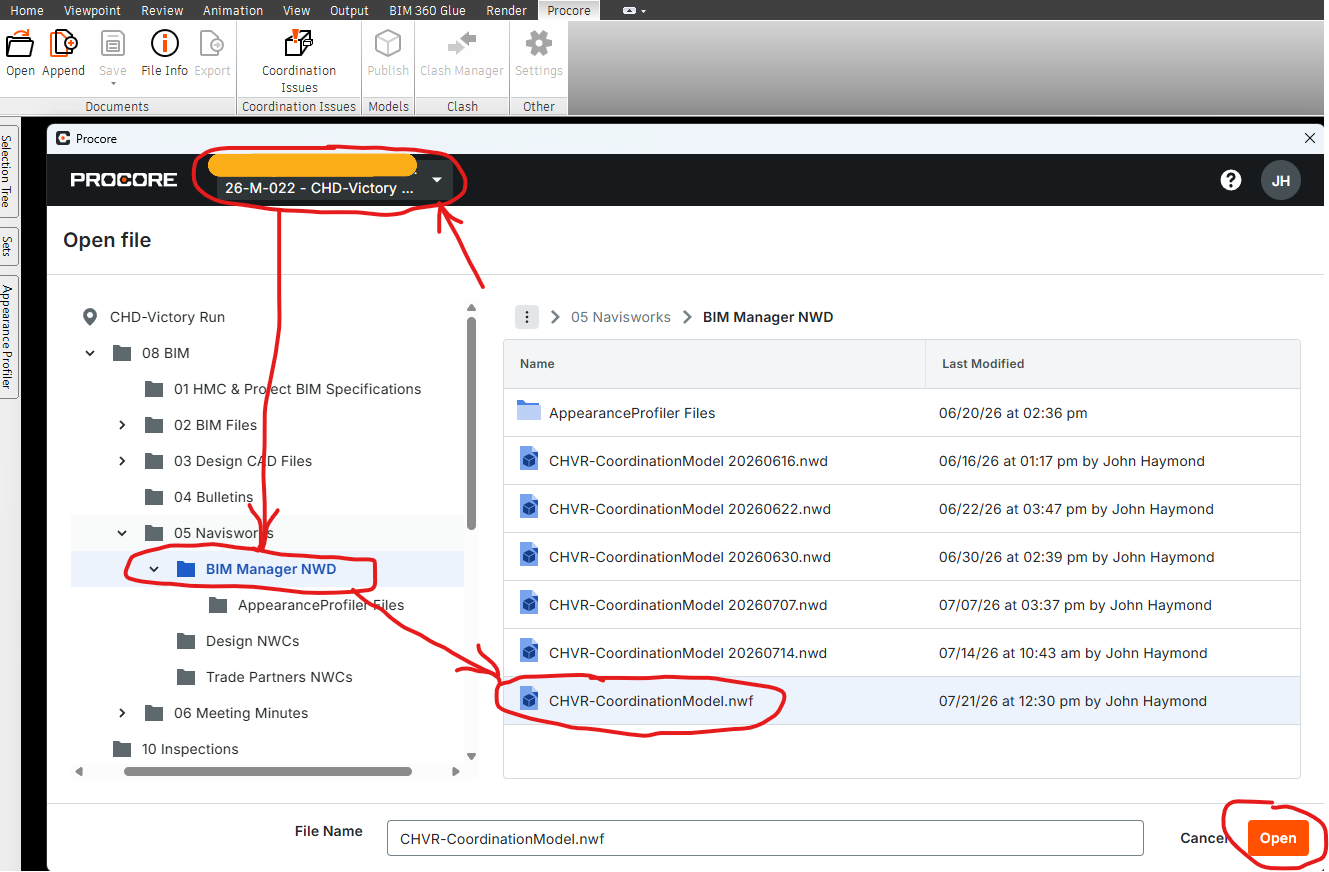
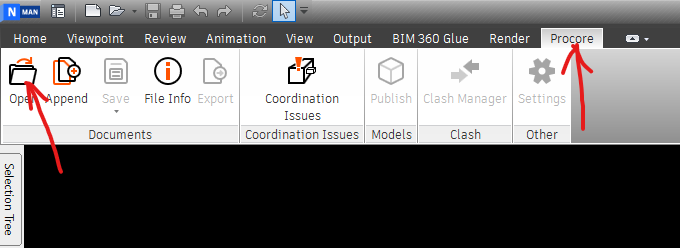
If you are already logged into Procore, when you select the ‘Procore’ ribbon you will be able to select the ‘Open’ button to access the navigation screen.
File Information
A handy tool for analyzing the appended files in your nwf is the ‘File Info’ button.
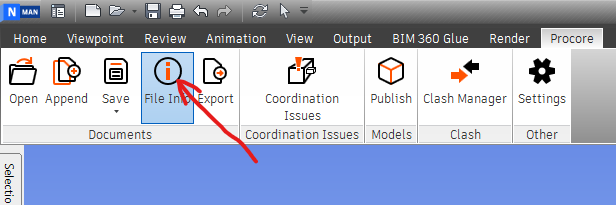
Select this button to see the files that are part of your model and their status. A separate window will open as shown below.
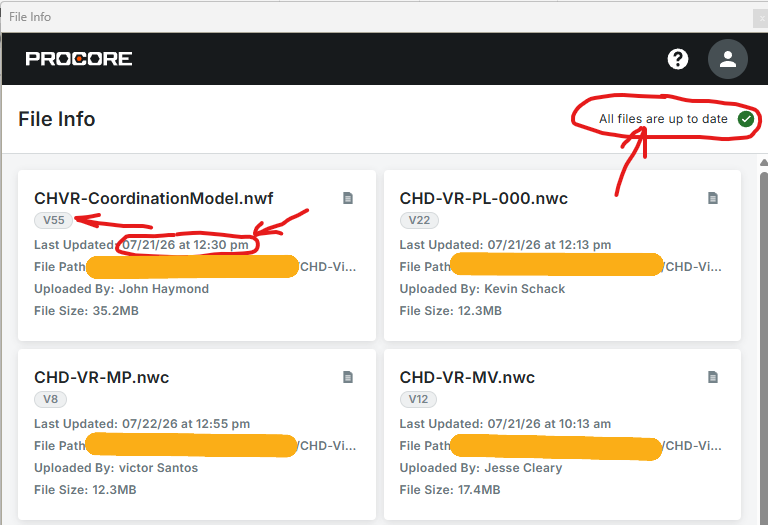
The appended files are shown in boxes with the current version number and the last upload date and time. If all files are up to date, this is indicated in the top right corner of the window.
If some files are not up to date, the window will look similar to below.
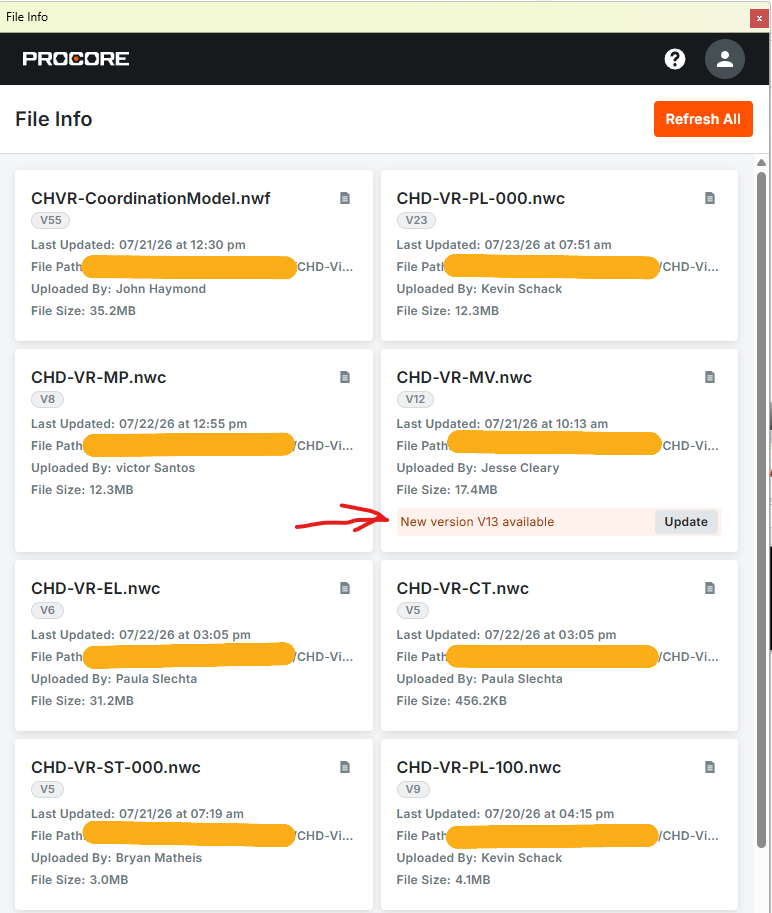
If a file has been updated in Procore, it doesn’t automatically update in Navisworks. This will show in the box of the outdated file and also in the top right corner, which now presents a ‘Refresh All’ button.
Great explanation. Thank You!